Guide to supplying print ready PDF files for book printing
A printer will likely ask you to supply a “print ready PDF files” and to the untrained this can seem like a daunting prospect.
If you’re looking produce print ready files yourself, our aim is to make this process as stress free as possible.
However, if you want help with laying out text or a vibrant cover design then we can recommend designers that we have worked with for a number of years with budgets to suit everyone. Please contact us for further details.
Our service expectations
Files supplied to us are checked (“preflighted”) when they arrive with us to ensure they meet the technical requirements of commercial printing. They’re checked against the job brief – i.e. does the artwork match the order’s size, and are the cover dimensions correct for the expected size of book? etc.
It should be noted that files supplied to us are expected to have already been proof-read – we do not check for spelling and grammar. Here we have some word template files to get you started with laying out your text in Microsoft Word. These are already set up for the most popular standard book sizes.
Download Full Guide
We've prepared a detailed file to assist you in creating a print ready PDF file of your book.
Download FileFirst off... Why do we use PDF?
PDF (portable Document Format) “locks” the words and images in place on the page and when set up correctly ensures that everything needed for printing is contained (or embedded) within the one file, so regardless of computer platform or printing press, the end printed result is the same.
Word files are great when writing the book itself, but they do not transfer well between systems, as they rely on the individual computer’s fonts and printer settings, which vary from computer to computer.
Imagine sending a document to your desktop printer, the data goes to the printer. When you create a PFG it creates a file that can then be released to another printer elsewhere.
In fact one method of creating a PDF is to print a document to a “PDF printer”, which actually saves a file instead of sending the data to a printer. Nowadays Word files can be saved as PDF, but the internal process is the same.
Different components of a book
There are a variety of different book styles that can be produced, each having different components that each require a separate PDF with which to print from.

Saddle-Stiched Booklets
Have a set of inner pages and often an outer (thicker) cover, folded in half with two staples in the spine to keep it all together. The folded booklet is then trimmed flush to the specified size.

Paperback (Limp) Books
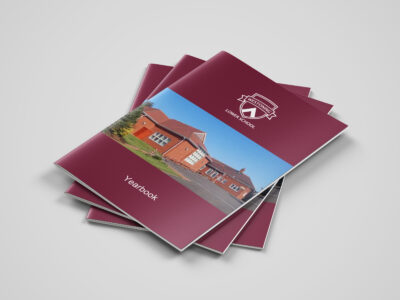
Have a “book block” (set of pages often printed on a white lightweight paper) and a card cover (usually printed in colour) glued to the spine (“bound”), and trimmed flush to the specified size.

Hardback (Cased) Books
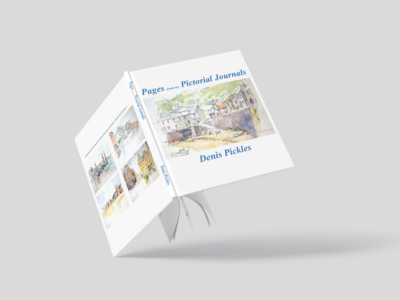
Have the book block bound on the spine with front and back endpapers and trimmed to the specified size. This trimmed bookblock is then “cased-in” – the hard cover (or “case”) is glued to the front and back endpapers and overhangs the bookblock by about 3mm. The case can be either finished in cloth or a printed papercase (“PPC”).
Bleed
Bleed is a fundamental requirement of printing, yet is often overlooked as it is not obvious to the end reader that it is required. Bleed is extra print that goes beyond the finished page size, and is only required when the print is to fall-off the finished page.
Book pages are printed on larger sheets of paper, then trimmed to exact size. Bleed is necessary due to the variation of the relative position of the print on the sheet, which can occur at various stages in the production – such as printing, folding and trimming. Therefore, print ready files should have an extra edge (typically 3mm), so the final trimmed product will always appear printed to the very edge.
Image resolution
An image’s resolution can be found in Photoshop: Image Menu -> Image Size. For colour/monochrome photographs, 300dpi is the optimum resolution to use. For 1-bit images (e.g. scanned text / line-art) 600-1200dpi is best.
Remember that by enlarging or reducing the image, it’s resolution is also affected. For example, a fair 200dpi image doubled in size will reduce it’s resolution to a poor 100dpi.
Use of colours in book printing - RGB vs CMYM
Computer monitors emit colour as RGB (red, green, blue). Although all colours of the visible spectrum can be produced by merging red, green and blue light, monitors are capable of displaying only a limited range.
Whereas monitors emit light, inked paper absorbs or reflects specific wavelengths. CMYK (cyan, magenta and yellow) pigments serve as filters, subtracting varying degrees of red, green and blue from white light to produce a selective range of colours.
Printing inks also produce colours that are only a subset of the visible spectrum, and the colour range is not the same for both, and is wider on RGB than CMYK. To add to this the CMYK model is also subject to the ambient lighting conditions. Consequently, the same art displayed on a computer monitor may not match to that printed in a publication.
If your page layout software is capable of CMYK workflow, use CMYK based colours, and convert source images to CMYK before placing into your page layout. For best colour conversion use a FOGRA colour profile if available.
Where this is not possible, we can accept RGB images, but please note that RGB will be converted to CMYK on the press, and the colour conversion may not be totally accurate. Most digital devices (such as
digital cameras) tag the RGB image with a source colour profile, which makes the RGB conversion more accurate.
Generating a print ready PDF
Here’s some tips for creating a PDF file for the text element of your book:
- If you’re using MS Word you make the page size around 6mm bigger to allow for a bleed.
- Make use of text justification. e.g. centre heading using the inbuilt functionality rather than just pressing space until it looks right.
- Use tabulation to keep lists in line – such as on contents page.
- Ensure your images a good quality, anything below 150dpi will look pixelated.
- Ensure all fonts are installed on your computer, otherwise they will not embed into the PDF
You can find detailed instructions on how to create a PDF from a range of software in our full guide.

Creating the book covers
The outer cover, be it a paperback, hardback jacket, or printed paper case, is printed separately from the text block, and is joined to it at binding stage. It is also quite likely to be printed on a different press, therefore needs to be supplied as a separate single PDF file.
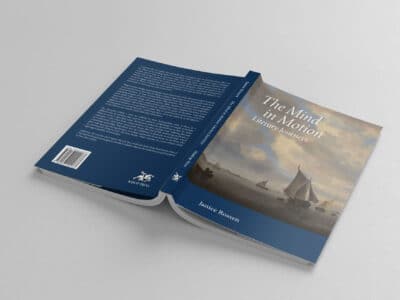
Imagine opening the book and turn it cover face up so you see the back cover, spine and front cover from left to right facing you. That’s roughly how the PDF should look that is supplied for printing.
We can supply you with a flat plan, with all the measurements required to produce cover artwork. The width of the spin will be dictated by how many pages are in your book.
If you’re using professional design software such as Quark or InDesign, you should set the document size to the size of the cover as indicated on the plan excluding bleed – as the bleed will be allowed for on output. The software can automatically add trim marks when output to PDF.
If you’re using a program that doesn’t allow for bleed, such as Word, set the document size to the overall size of the cover as indicated on the plan including bleed. Remember that 3mm will be trimmed off each edge, so keep any objects that shouldn’t bleed well away from the edges.
There’s a detailed walk through of setting up book covers in all formats of book in our full guide.
Download Full Guide
We've prepared a detailed file to assist you in creating a print ready PDF file of your book.
Download File
From PDF to printed book
We can transform your PDF documents into a beautiful, handmade paperback or hardback book that would grace any bookshelf.

A quick guide to self editing
Here are some useful tips and considerations to help you with self editing.

Use Microsoft Word to write your book
We’ve pulled together our reasons for using Microsoft Word for writing and editing a book so you can decide whether it might be the best option for you

How to print your own book
If you’re wondering how to go about printing your own book, P2D Books Ltd can help! Here’s our handy guide for what to consider.
